Summer Scones with Clotted Cream & Jam

Hi Everyone

Since our last post with our Victoria Sponge recipe last week, the blog has been read by people in the UK, USA, India, Germany, Romania, Canada, Netherlands, New Zealand, Japan and Denmark! It is  amazing the way we can write something here in Shetland and it is then read all over the world in  a few hours!

Well, our latest recipe is something which we love as an afternoon treat every so often especially if we have people coming to visit – it is a quick home bake, but always tastes amazing:  Summer Scones with Clotted Cream and Jam.

DSCF3170

Makes 10 medium sized scones

Ingredients – Summer Scones

225g Self Raising flour, 50g Caster sugar, 50g Margarine, 1 egg, pinch of salt and approx. 150mls of milk

Decoration and Filling

Strawberry Jam, Tub of Clotted Cream

Prep: 10 mins  Cook: 10 mins   

Step 1 – Preheat oven to 220 C / Gas mark 5. Grease a Baking Tray

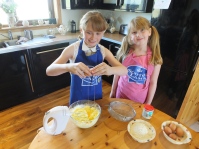
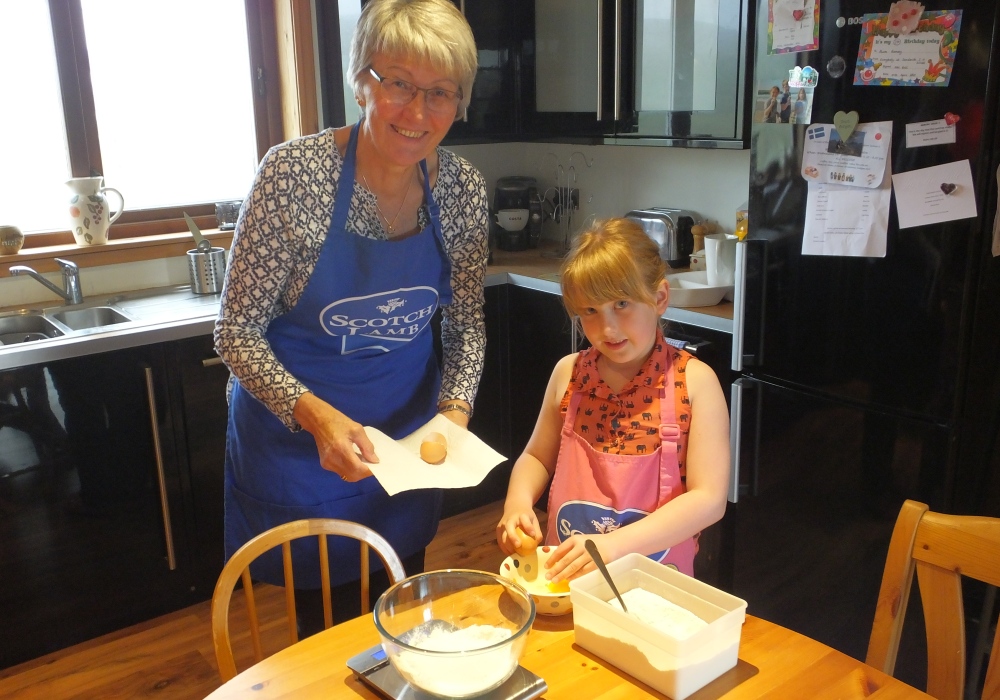
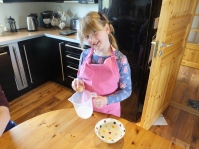
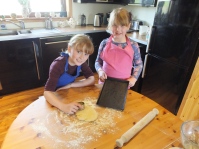
Step 2– Weigh into a bowl 225g of Self Raising flour, 50 grams of margarine and add a pinch of salt. Then using your hands, rub the ingredients together using your finger tips – make sure your hands are cool.

DSCF3134DSCF3135

Step 3 – Once the ingredients are rubbed together add in the caster sugar and mix.

DSCF3137

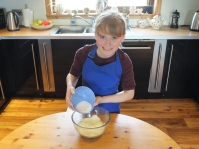
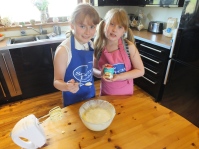
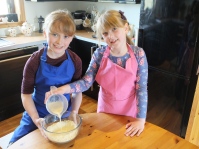
Step 4 – Into a jug add 150mls of milk and then crack an egg into the milk and whisk together. Then making a well in your mixture, add the milk and egg mixture gradually (You may not need all this mixture and also leaving some liquid to use to glaze the scones before baking.) Then mix using a table knife. The mixture should not be too sticky.

DSCF3136DSCF3138DSCF3141

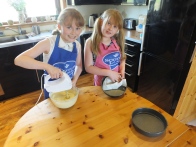
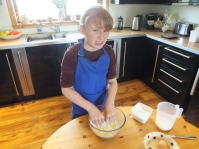
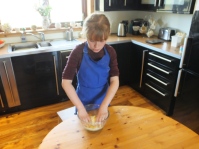
Step 5 – Once you have mixed the mixture, use your hands to kneed the mixture together in the bowl.

DSCF3142

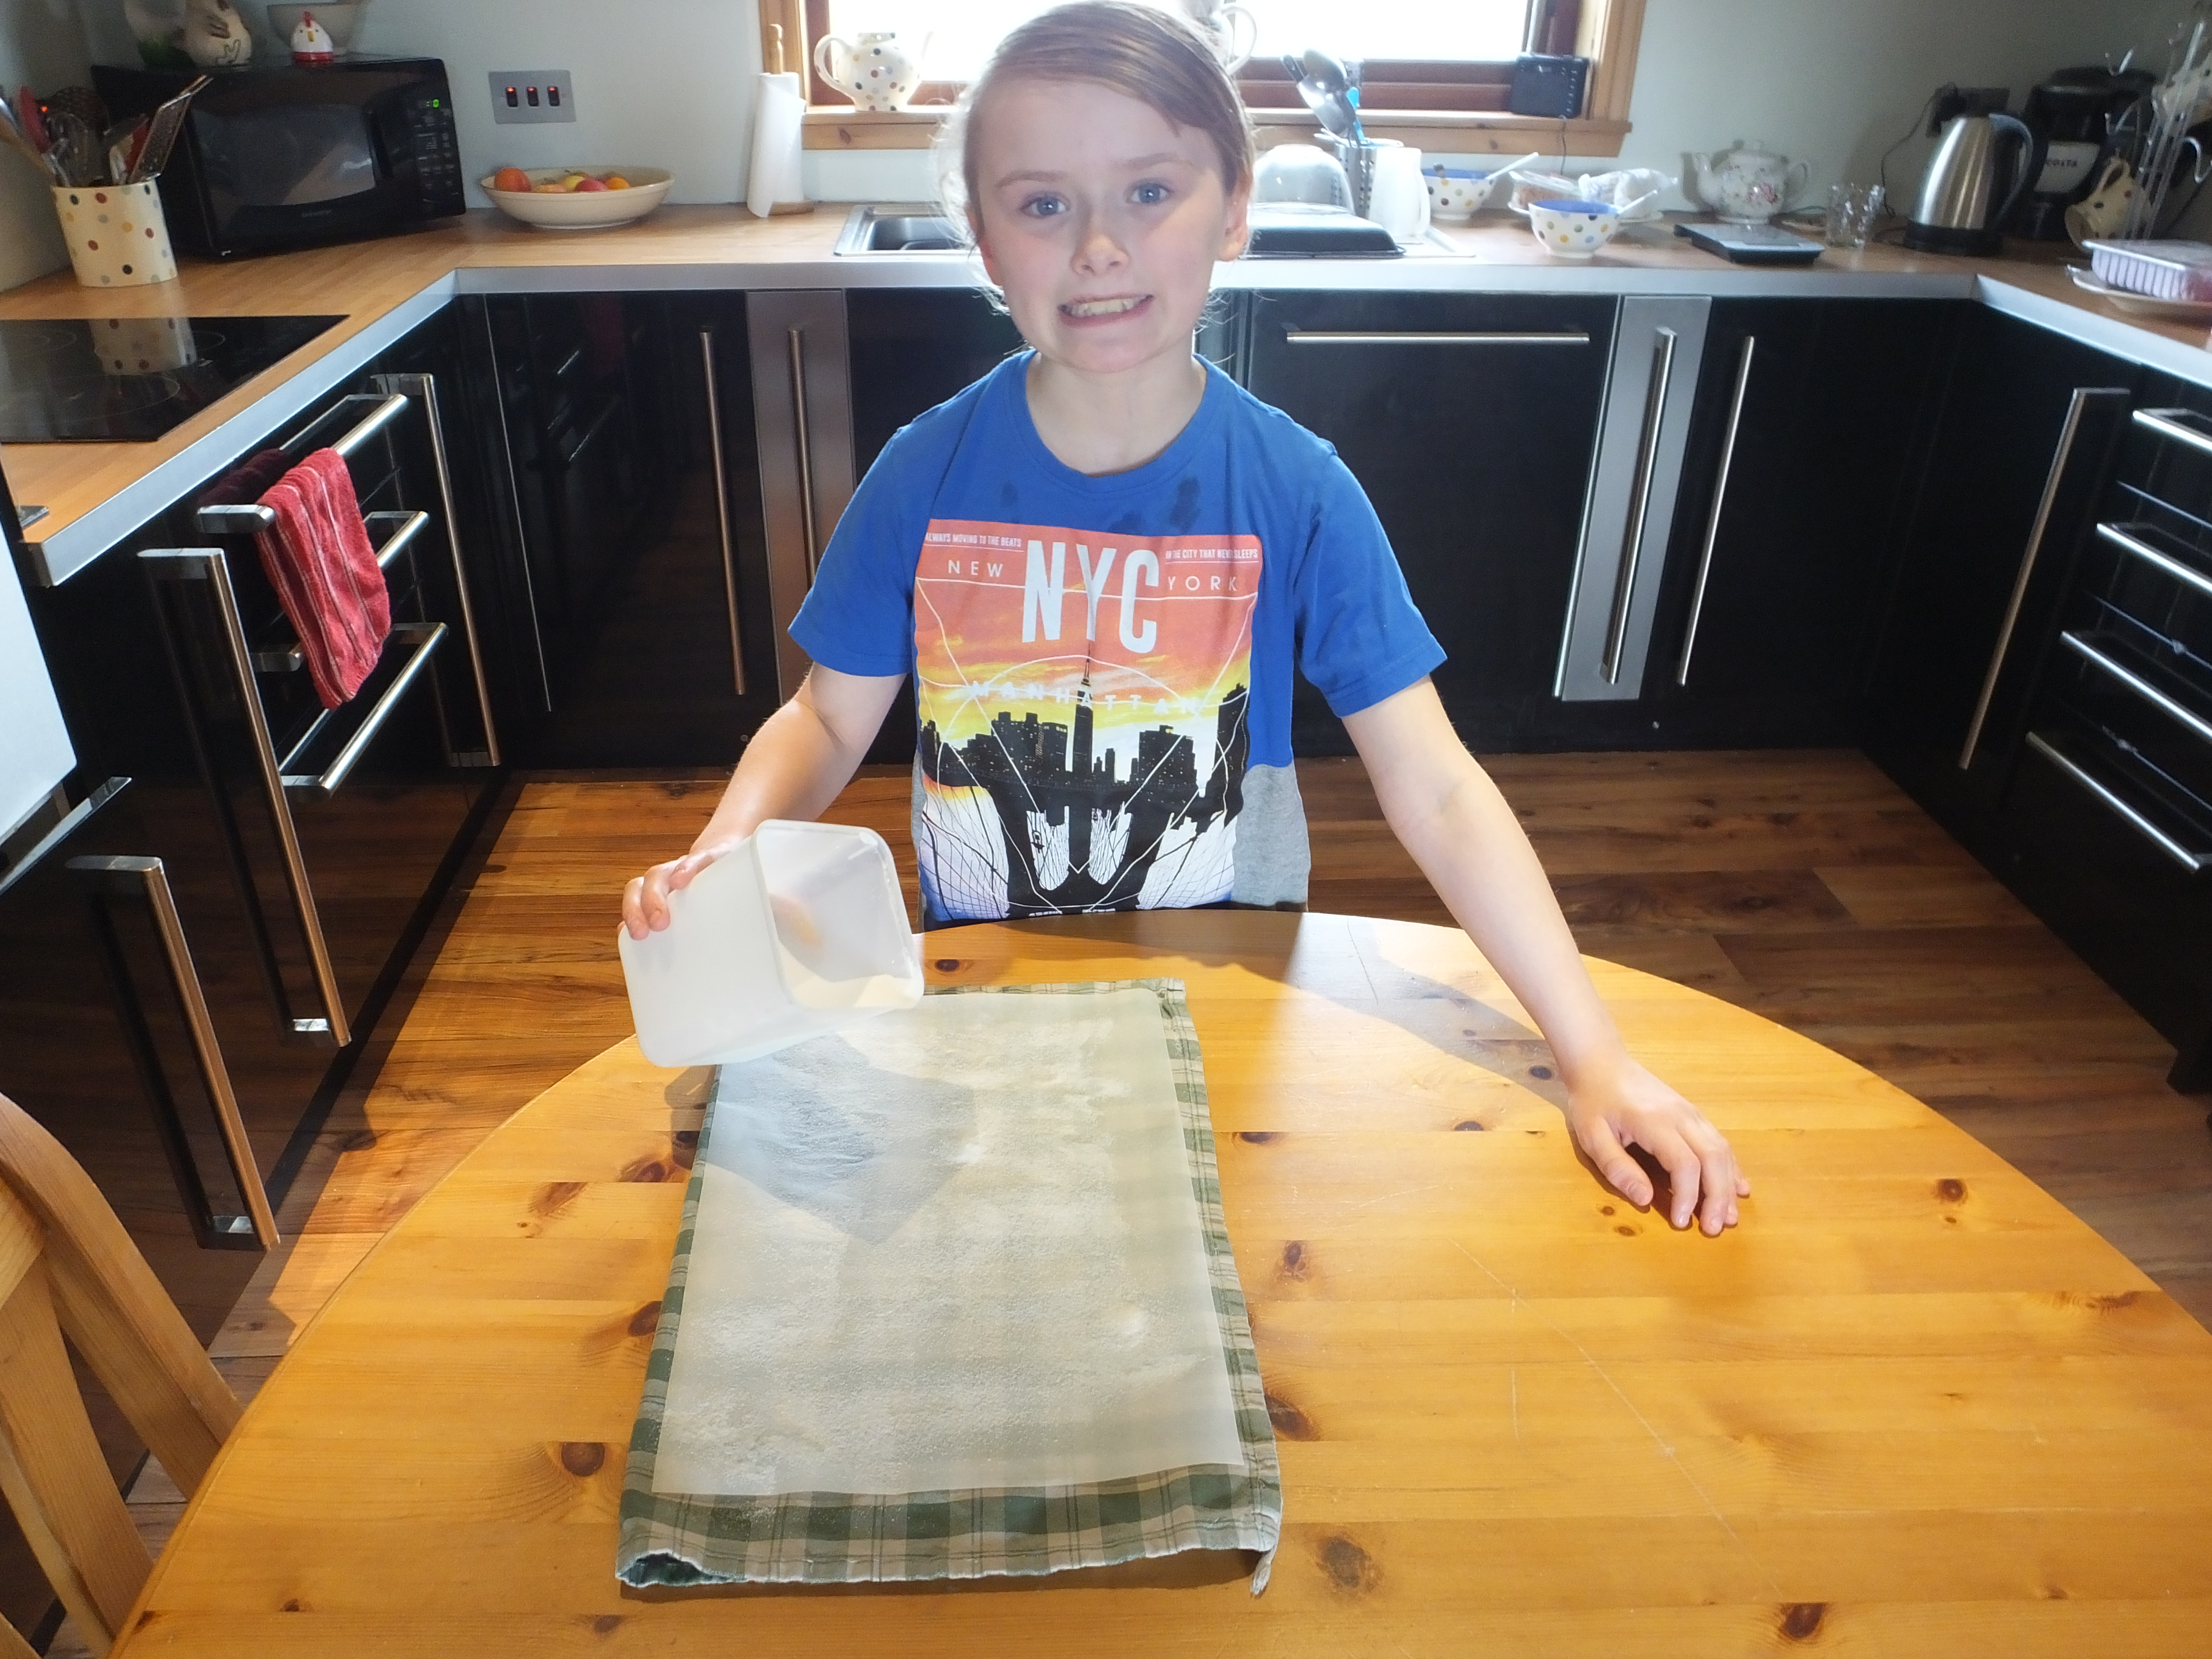
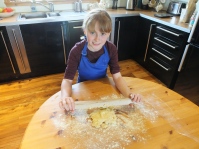
Step 6– Spread a little flour on your surface and then empty the mixture from the bowl onto it.. Roll with a rolling pin to about a 1.5 – 2cm depth. Take a medium cutter and start to cut out rounds. always collect the scraps together,  kneed together and cut until you have no dough left.

DSCF3144DSCF3145DSCF3146

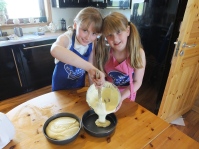
Step 7 – Once all scones have been cut out of the dough, lay them onto the baking tray and using a brush, glaze the top of each scone and  place in the preheated oven for 10mins.

DSCF3147

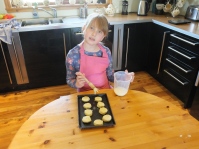
Step 8 -Once the scones are golden brown and well risen, cool them on a rack,

Step 9 -Once cooled, cut the scones open and spread with strawberry jam and then a dollop of Clotted cream

DSCF3170

There you have it Summer Scones with Clotted Cream and Jam, ideal for a summer treat or when visitors are coming

We do hope you have a go and enjoy making these Summer Scones letting all your friends and family try them.

Do let us know if you get a chance to make these scones  and remember to post pictures of some of your own creations.

Love

Jennifer and Alison

The Ramsay Girls – Victoria Sponge

Hi Everyone

We hope you are the making the most of this great weather, even in Shetland the sun is shining and we don’t have to wear coats or jumpers….

Today we have been off school on holiday and along with our Dad, decided we would make a Victoria sponge, Dad said this was his favourite cake growing up.. mind you that was a long time ago….

This is a simple and easy recipe, but also looks great when you serve it!

DSCF3167

Serves: 12-16 depending on how big or small you serve it!

Ingredients – Victoria Sponge

300g Self Raising flour, 300g Caster sugar, 300g Margarine, 1 teaspoon of Baking powder and 6 eggs.

Decoration and Filling

Strawberry Jam, a dusting of Icing Sugar

Prep: 15 mins  Cook: 35 mins   

Step 1 – Preheat oven to 180 C / Gas mark 5. Line/grease 2 baking tins (7inch baking tins)

Step 2– Weigh into a bowl the 300 grams of caster sugar and 300 grams of margarine and cream together until the mixture is  light colour.

DSCF3120DSCF3123

Step 3 – Sift roughly a third of the flour, and add 2 eggs to the mixture and mix together – doing this three times  until all the eggs and flour have been added.

DSCF3124DSCF3125DSCF3126

Step 4 – As you mix the third and final batch of flour and egg also add in 1 teaspoon of Baking powder.

DSCF3127

Step 5 – Once you have mixed all the ingredients together, either line or grease the two baking tins and then split the mixture evenly between both tins.

DSCF3128DSCF3131

Step 6 – Once the oven is preheated, pop the two tins in the oven for 35mins to bake.

Then its time for the obligatory clean up!

DSCF3132

Step 7 -Once the sponges are baked,  cool them on a rack,

Step 8 -Once cooled, spread one sponge with the strawberry jam, place the other sponge on top and give a light dusting of the Icing sugar

DSCF3167

There you have it The Ramsay Girls – Victoria Sponge, ideal for any surprise visitors or  a summer nights treat!

We do hope you have a go and enjoy making this Victoria Sponge and giving it to all your friends and family, let us know if you get a chance to make one and remember to post pictures of some of your own creations.

Love

Jennifer and Alison

Pumpkin Party Muffins

Hi Everyone

We hope you tried making the Malteser Cake in our last blog. Find the Recipe Here

Today Alison and I carved our pumpkins for Halloween with Dad which was great fun  but also a bit messy.

As we started to hollow out our pumpkins we started to wonder what could we make from the Pumpkin insides that we could serve to people on Halloween especially at a party or even when they come trick or treating?.

After thinking about it we came up with the idea of  Pumpkin Party Muffins

DSCF2204

Serves: 18

Ingredients – Muffins

280g plain flour, 1 tspn ground cinnamon, 1/2 tspn ground nutmeg, 1/2 tspn ground ginger 1/2 tspn ground mixed spice,       1/2 tspn salt, 1 tspn baking powder, 1/2 tspn  bicarbonate of soda, 110g soft margarine, 200g caster sugar, 5 tablespoons brown soft sugar. 2 eggs, 160ml milk,  250g pumpkin flesh

Ingredients – Cream Cheese icing

200g cream cheese, softened, 50g butter, 400g icing sugar, 1 tspn vanilla extract, 1 tspn ground cinnamon

Prep: 25 mins  Cook: 25 mins                                                                                                                                                                                          

Step 1 – Preheat oven to 190 C / Gas mark 5. Line a muffin tin with 18 paper muffin cases.

Step 2– Cook and Puree the 250g of Pumpkin – place pumpkin in a small pan, with a little water and heat on a medium heat until the pumpkin is soft. Then puree the pumpkin with an electric blender or mash up with a potato masher. Leave to cool.

DSCF2182DSCF2191DSCF2195

Step 3 – Sift together the flour, cinnamon,  nutmeg, ginger,  mixed spice, salt, baking powder and bicarbonate into a large  bowl.

Step 4 – Mix together the butter, caster sugar and brown sugar with an electric mixer in a large bowl. The mixture should be noticeably lighter in colour. then add the eggs one at a time, allowing each egg to mix into the mixture before adding the next egg.

DSCF2193

Step 5 –  Stir in the milk and pumpkin puree after the last egg. Stir in the flour mixture. Pour the cupcake mixture into the prepared muffin cases (We poured the mixture into a measuring jug). Make sure the cases are 2/3 filled. and bake in the preheated oven until golden and the tops spring back when lightly pressed – about 25 minutes.

DSCF2197

Cool in the tins for 5 minutes before removing to cool completely on a wire rack.

Step 6 – While the cupcakes are cooling, make the icing by mixing the cream cheese and  butter with an electric mixer in a bowl . Mix in the icing sugar a little at a time. Add the vanilla extract and 1 tspn of ground cinnamon; mix until fluffy.

DSCF2200

Step 7 -Once the cupcakes are cool, ice with the cream cheese icing.  Optional – if you can find any sugar crafted haloween decorations you can add them to the muffins once iced.

There you have it Pumpkin Party Muffins, not sure they will last until Halloween they are delicious!

DSCF2204

We hope you enjoy making these Pumpkin Party Muffins and giving them to all your friends and family, let us know if you get a chance to make these and remember to post pictures of some of your own Halloween creations.

Love

Jennifer and Alison

Mouthwatering Malteser Cake!

Hi Everyone

It has been so long since we last blogged, The whole summer has gone, but we have still been baking!

Over the summer one of our Mum’s friends, Lorna came to stay and she makes the best Malteser cake! So we asked if she would share her recipe and make it with us.

We hope you enjoy giving this a try as much as Alison did!

Recipe

200g Maltesers. 100g Margarine, 200g Galaxy Chocolate Bar, 200g Digestive Biscuis, 200g White chocolate and 3 tbsp of Syrup,

Prep time: 20 mins – Chill time – 1 hr

Step 1 –  In a saucepan melt together 200g of Margarine, 3 tbsp of Syrup and 200g of Galaxy chocolate on a low heat on the hob

DSCF1990DSCF1992

Step 2 –  Crush the 200g of Digestive biscuits and then 175g of Maltesers

DSCF1991

Step 3 –  Take the Pan of melted ingredients off the heat and add the Crushed Digestives and Maltesers and stir together.

DSCF1996

 Step 4-  Line a swiss roll tin with some grease proof paper and then place all the mixed ingredients into a baking tray,Spread the mixture evenly across the baking tray.

DSCF1993 DSCF1997DSCF1999

Step 5-   As the mixture is cooling, melt some white chocolate and then spread over the top of the mixture

DSCF2002 DSCF2004 DSCF2005

Step 6-   Sprinkle the remaining 25 grams of Maltesers (crushed) over the top of the white chocolate

DSCF2003 DSCF2006

Step 7-   Place in the fridge and allow to cool for 1 hour

DSCF2008

Step 8-   Take out the fridge when cooled, remove from baking tray and cut into small pieces.

DSCF2011

We hope you try and make some of this Mouthwatering Malteser Cake? Let us know how you get on!

Thanks for visiting Lorna and do come again!

Love

Alison and Jennifer (and Lorna too!)

Dropped Scone or Scotch Pancake? – Guest Blog

Hi

Hope you enjoyed trying to make our Mars Bar Cake!

A few weeks ago we had friends staying with us called Peter and Carolyn Norris from Petersfield in Hampshire. They are close friends and it was great to see them and for them to experience Shetland!

Carolyn has always wanted to make Dropped Scones or Scotch Pancakes as some people call them.

So the ‘Ramsay Girls’ decided to try and make them with Carolyn along with a little help from Mum.

Recipe

200g Self Raising Flour, 100g Caster Sugar , 2 Eggs,  120mls Milk, 2 pinches of Salt

Prep time: 10mins – Cooking time – 10-15mins

Step 1 –  In a bowl mix together the self raising flour, salt and sugar.

 DSCF1890

Step 2 –  Add in the 2 eggs

Mums Tips: Mum suggest we always crack the eggs into a separate bowl just in case the shell falls in? its easier to get the egg shell out a bowl rather than out of the whole mixture!

 DSCF1892

Step 3 –  Pour in the milk and mix until you have a batter.

 DSCF1893

Step 4-   You then need to heat the frying pan to a medium heat or we use a Girdle. This needs to be well greased with a little butter or oil.

Step 5-   You then spoon a little of the mixture onto the hot frying pan or Girdle..

 DSCF1897

Step 6-  Cook until the underside has gone golden brown and you can see air bubbles appearing on the top of the mixture. This normally take a few minutes. You can then flip the pancake and cook on the opposite side until Golden brown.

 DSCF1895

Step 6 –  Once cooked then take off the heat and let them cool on a cooling tray, Mum often uses a tea towel to keep them fresh.

 DSCF1905

Step 7 –  You can then serve them with butter and Jam on.

Alison’s Favourite topping: Butter and syrup and a few raspberries….

Jennifer’s Favourite topping: Just lots of butter

What’s Your Favourite topping? Let us know!

Thanks for visiting Carolyn and do come again!

Love

Alison and Jennifer

Mars Bar Cake – While Mum is Away!

Hi Everyone

We spoke with someone recently who was going to try our Shortbread Recipe, if you try one of our recipe’s do let us know how you get on!

Mum is away this weekend and Jennifer has popped out to the cinema with friends. So Dad and I decided we wanted to do something that was really simple to make and not to complicated!

Dad thought we should try and make a tray bake and so we have tried Mars Bar Cake!

Recipe

4 Mars Bars,, 120g Margarine, 300g Rice Crispies, 250g Milk Chocolate

Prep time: 15-20mins  – Cooling time – 1.30hrs

DSCF1918

Before you start:  Cut and place baking paper into a baking tray (helps to reduce sticking)

Step 1 –  Chop the 4 Mars Bars in to small chunks

DSCF1919

Step 2 –  Heat a pan of boiling water and place a bowl over it to melt the chopped Mars Bars and  margarine. (You will need an adult to help with this as it will be hot! Mum is not here, so Dad has to be responsible!!!)

DSCF1921

Step 3 –  Once the mars bars and margarine have melted, take the bowl off the heat and then mix in the rice crispies. Make sure the rice crispies are all coated in the melted mixture.

DSCF1924

Step 4-  Once your mixture is ready, place and pat down all the mixture in the baking tray – making sure the surface is flat and even.

DSCF1926

Step 5-  Using the boiling water in the pan again, chop your milk chocolate into a bowl and let it melt!

DSCF1928

Step 6 –  Take the melted chocolate off the heat and spread over the top of the rice crispies. Remember to spread evenly!

DSCF1929

Step 7 –  Once the chocolate is spread, you can then place the baking tray in the fridge to cool for 1.30hrs

Dad: Can I like the chocolate from the bowl now!

Step 8 –  Take your baking tray out of the fridge and remove the mars bar cake, This is where you are thankful for putting the baking paper in the tray!

Step 9 –  Cut up into individual portions and then serve.

DSCF1933

And there you have it, how to make Mars Bar Cake  with your Dad!

Happy Fathers Day, Dad!

love

Alison

Pie Face Fun !

Hi

Jennifer here!

As it’s the weekend I thought I would share with you this fun little video which was taken of me at my friend Willum’s birthday party a few weeks ago

It is sort of food related! ‘Pie’ Face

Hope you enjoy watching it as much as I did playing the game

Have a great weekend

Jennifer

The Ramsay Life – A weekend in St Andrews……

Hi Everyone, Jennifer here!

I just wanted to blog about our recent trip to St Andrews where Alison and I (along with Mum and Dad!)  met with Dad’s side of the family in St Andrews for a weekend of fun, to celebrate the 25th Wedding Anniversary of Nana and Papa.

It was a glorious Friday night in St Andrews and we spent the night going for a walk along by the East Sands Beach. Dad tried to be arty with the camera and this was one of the pictures. He made us stand with our arms in the air for ages……We were with our cousin Rhu (He is taller but I am the oldest!)

DSCF1597

Jennifer, Alison and Rhu

The sun was shining all weekend and we spent most of it walking around St Andrews in our shorts and t-shirts!

DSCF1595

St Andrews, East Sands

One of the great things about the weekend was the park where we played for ages on a big swing.

DSCF1599

DSCF1598

Rhu even tried to get fit on the outdoor gym

DSCF1605

Then Ali and I had a go (to work off all the baking we have been eating!)

DSCF1608

On Saturday we went to the Famous St Andrews Golf Course and we had a round of 9 Holes ( Well we went on the putting green not the real course!)

DSCF1610

Jennifer going for a hole in one!

DSCF1612

Rhu, Jennifer and Uncle Craig

DSCF1611

Papa going for the winning putt

DSCF1614

Nana, Mum and Alison enjoying the Sun!

As it was Nana and Papa’s special weekend then Rhu, Alison and I had our picture taken on the famous Swilcan Bridge on the 18th Hole of the St Andrews Golf Course

DSCF1619

Happy 25th Anniversary Nana and Papa

At the end of the day, to please Dad we all had a visit to Starbucks

DSCF1624

Ramsay, Murray, Menzie Families gathering in Starbucks!

It was a great weekend in St Andrews and even better that we could spend time together as a family having so much fun! Oh and in the sun

Write again soon!

Jennifer

Smartie Cookies

Hi Everyone

Well it was another wet and windy night here in Shetland last night and we thought we could have a go at another little treat as we go into the weekend – Smartie Cookies

DSCF1574

Recipe

75g Self Raising Flour, 50g Margarine, 50g Caster Sugar, 5ml Syrup, 2.5ml Baking powder

1 Tube of Smarties

Prep time: 10-15mins  – Baking time – 10-15mins

Before you start:  Grease two baking trays and pre-heat the oven to 180c or Gas mark 5

Step 1 –  Cream the margarine, syrup and caster sugar together in  a large bowl

DSCF1569

Step 2 –  Sieve the flour and baking powder together into the creamed mixture

DSCF1570

Step 3 – Using a T-spoon to measure the mixture, roll the mixture in your hands to make balls. place the balls onto the baking trays.

Mums Tip  –  Allow space between the balls on the tray as they will spread out when in the oven.

DSCF1571

Step 4 – Place the Balls into the oven (180C, Gas Mark 5) for 10mins until they start to go slightly golden brown and cracking a little on the surface.

Step 5 – Smartie Time! Take the cookies out the oven and then place 3 or 4 smarties onto each cookie

DSCF1572

Step 6- Pop back in the oven for 2-3mins until Golden brown – try and make sure the smarties do not discolour!

Step 7 – Take out of the oven, let them cool in the tray for 2 minutes to harden and then place on a baking rack to cool

DSCF1574

Then there you have it!

Smartie Cookies ready to be eaten by the cookie monsters…….

Dad just requested a cookie made with just Blue Smarties, Mum said no way!!!!

Jennifer’s – Swiss Roll

Hi Everyone

Ssshhh… Don’t tell Alison but I decided to make a Swiss Roll without her this afternoon, with a little help from Mum.

I love making Swiss Roll as it cooks really quickly and you only need 3 main ingredients plus jam! When it is finished it is really great to look at as well!

We must mention that our blog has also been read in New Zealand, Switzerland and Cyprus over the last week. One or two of our readers were upset we missed their nations off our list in our last post!

So here goes,  I will try and explain how to make a Swiss Roll.

DSCF1591

Recipe

75g Plain Flour, 75g Caster Sugar, 3 Medium sized eggs

Prep time: 10 mins  – Baking time – 12mins

Step 1 – Weigh out all your ingredients. Whisk the three eggs and caster sugar together in  a glass bowl

Mum’s Top Tip – More air gets trapped using a glass or ceramic bowl rather than a plastic one.

Whisk until the mixture goes very, very thick.

Mum’s Top Tip – It should be whisked so thick until you can lift up some mixture with the whisks and quickly write your initial land it sits for a few seconds  before it disappears!

DSCF1575

Step 2 – Sieve all the plain flour onto a plate. Then sieve half of it again into the mixing bowl  and fold into the mixture.

Mum’s Top Tip – Use a metal tablespoon and fold the flour in a figure of 8 motion until all the flour has disappeared. Lift your bowl up so you can see if there is any flour stuck at the bottom and also scrape your spoon as it get lots of flour stuck on it.

DSCF1577


Step 3 – Again sieve what’s remaining into the mixture and fold.

DSCF1578

Step 5 -Prepare your baking tray(Tray size = 20cm x 30cm with at least 1cm depth) . First lightly grease your tray and then place a piece of greaseproof paper on top of your tray – the paper should be just slightly bigger than your tray. Then at each corner snip a diagonal line about 4cm long and push the paper down into the tray. This will mean that your paper will sit well in the tin and give a good shape to your swiss roll. Lightly grease your tray and paper with a little more oil. A well prepared tray is vital for your swiss roll to work!

DSCF1581

Step 5 – Once you have your tray prepared, then empty your mixture from the bowl into the prepared baking tray. Once all the mixture is in the baking tray gently shake the tray so the mixture is spread evenly around the tin – if you use a spoon to spread out the mixture you can loose some air.

DSCF1582

Step 6 – Pop your baking tray in the oven at 200°C/fan180°C/gas 6 and then bake for around approx. 10 – 12 minutes. The mixture will be well risen and golden brown on top.

Step 7 – Quickly prepare for the sponge coming out of the oven by laying a lightly damp tea towel on a flat surface and laying down a sheet of grease proof paper and sprinkle caster sugar over the sheet.

DSCF1583

Step 8 – When the sponge is ready get a parent/helper to take the sponge out of the oven and then tip baking tray over so the sponge is top down on the grease proof paper.

DSCF1585

Step 9 – Ease off the greaseproof paper from the top of the sponge and start to cut the edges of the sponge with a sharp knife so you have nice neat edges.

DSCF1587

You can taste the sponge scraps you cut off!!!!

DSCF1588

Step 10 – Spread your choice of Jam or filling across the top of the whole sponge.

DSCF1589

Step 11- Start to roll the sponge  while still slightly warm, roll away from yourself. Some help maybe needed as two hands never feel enough at this stage!

DSCF1590

Step 12- Then place on a plate and sprinkle some more caster sugar over the top and Voila! you have made a fantastic Swiss roll!

DSCF1591

I hope you have ago and let us know how you find making Swiss roll!

You can post a picture of your results!

Oh no Dad and Alison have just come back and seen what I have been doing…… wait a minute they are getting a knife to have a taste while it’s still warm….. excuse me!  No you are not!!!